

How to sync data manually from Orderwise to HubSpot using OW Sync
Syncing data manually is important when you’re first setting up OW Sync to backfill data from Orderwise.
Please note: You should only use manual syncs when absolutely necessary, as they will pull your entire Orderwise database which can take hours depending on the volume of data you have. Manual syncs are required every time you set up and enable a new object mapping to ensure accurate interval syncs.
-
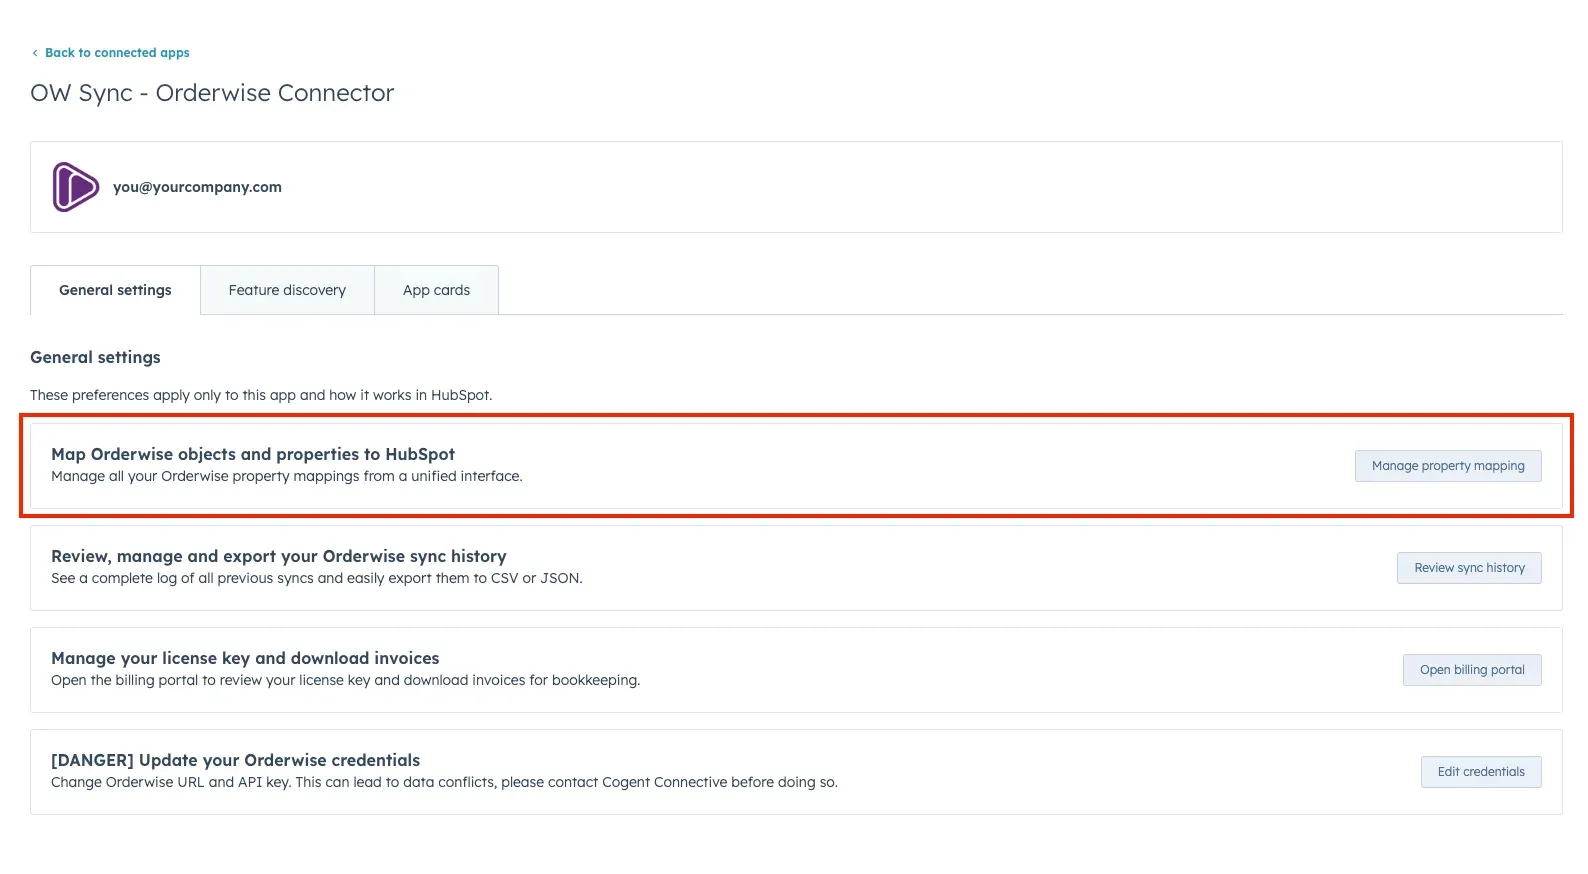
Navigate to the “Connected Apps” screen (under “Integrations” in settings) in your HubSpot instance and click on “OW Sync - Orderwise Connector”.
-
Click on “Manage property mapping” in the first row:
-
Select the “Manual Sync” tab.
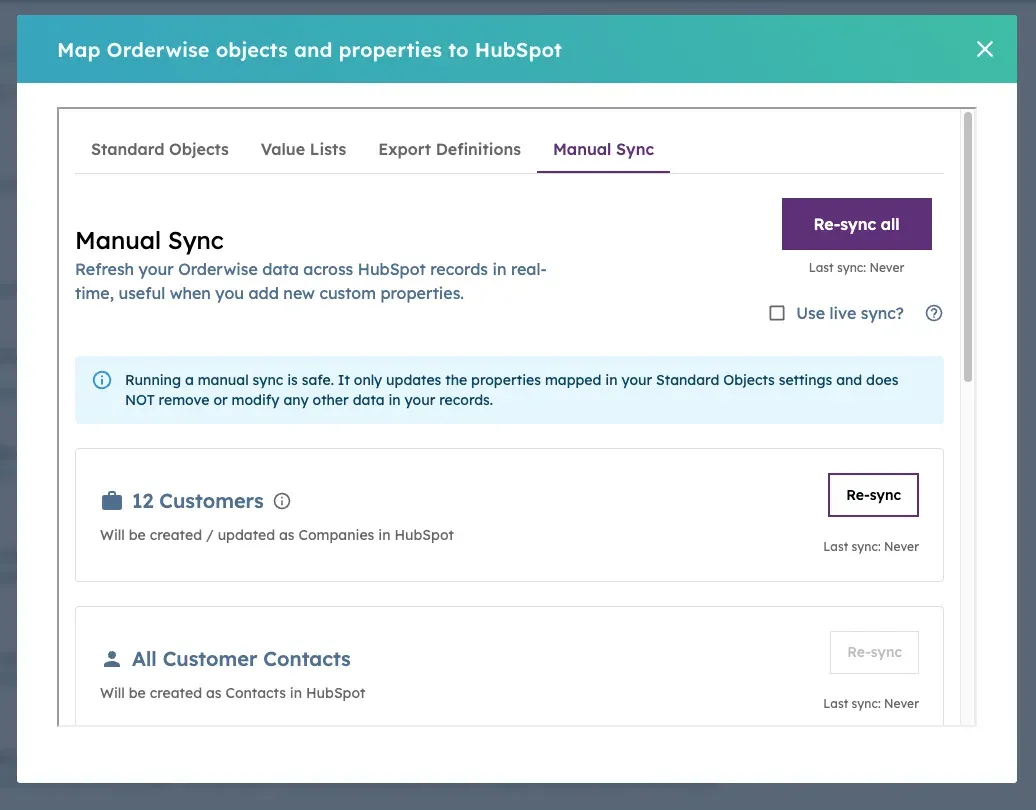
- Here, you will see a few features:
-
A “Re-sync all” button at the top
-
A “Use live sync?” checkbox right below it
-
Individual “Re-sync” buttons for each object type
-
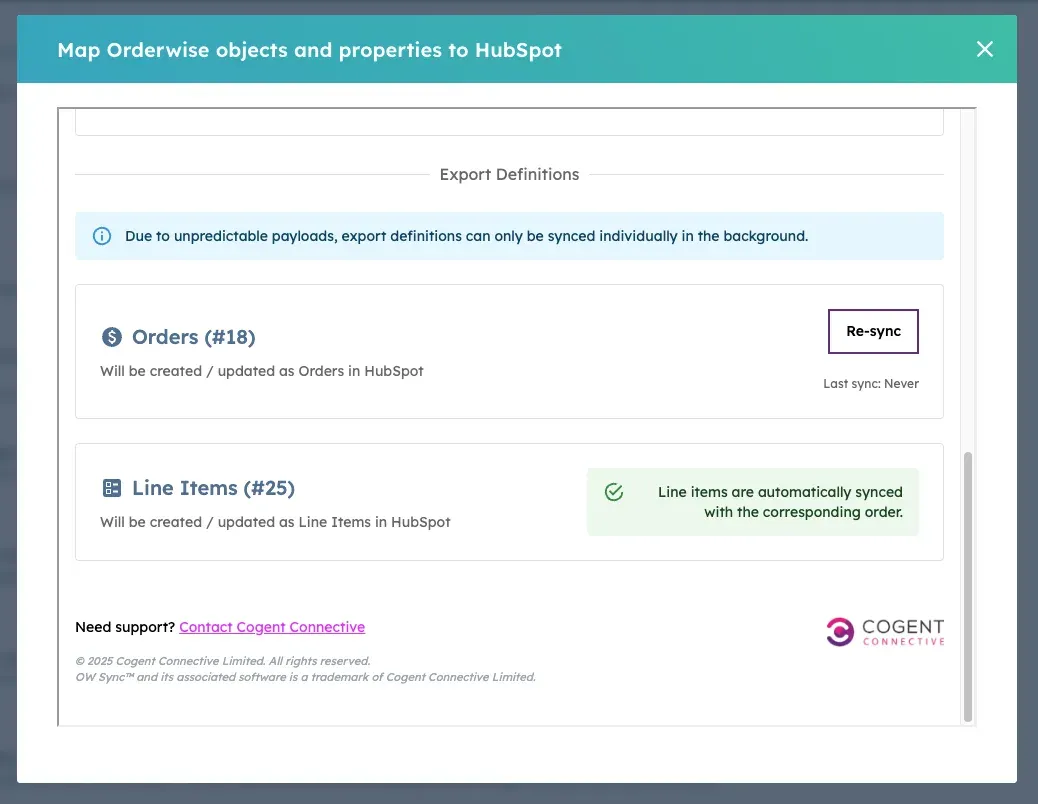
At the bottom, objects you’ve set up in your “Export Definitions” tab
-
- Important: All “Re-sync” functionality—including “Re-sync all”—dispatches sync requests in the background by default instead of running them in your browser. As it can take hours to process them, this is the preferred method for most users.
- If you have a small Orderwise database (fewer than 10,000 records per object), using the “Use live sync?” flag will run the request in your browser instead.
-
Note: We almost never recommend using this option compared to the background sync, but if you prefer, it is available.
-
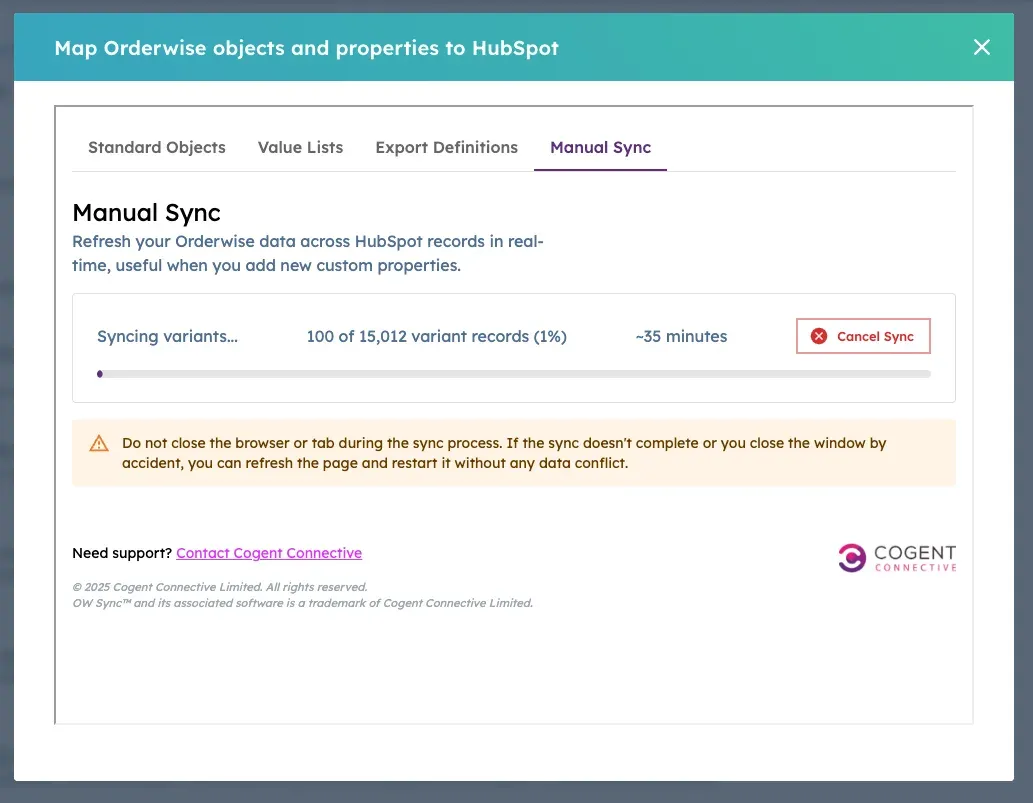
Simply select the checkbox, and then click on any of the “Re-sync” buttons. This will bring up a progress bar with a rough completion estimate.
-
If you see that the live sync takes too long to complete, you can choose to cancel it by clicking on “Cancel Sync”. Then de-select the “Use live sync?” checkbox and go back to a background sync instead.
-
- The “Re-sync all” button simply syncs all the available objects’ data at once instead of individually. Meaning, if you have customer and variant sync active, both of their data will be sent to HubSpot in unison with a single request.
- This is the most convenient option in most cases, as it will cover all the data you are interested in, including all the mappings and exclusion fields.
- You may want to use individual “Re-sync” buttons when you know the data you are looking for is localized only to customers, contacts, or variants.
- Here, you will see a few features:
-
Background sync is enforced for export definition objects instead as their data volume and payload size can be significantly higher than that of standard objects. To learn more about Export Definitions, see the Export Definitions guide.
-
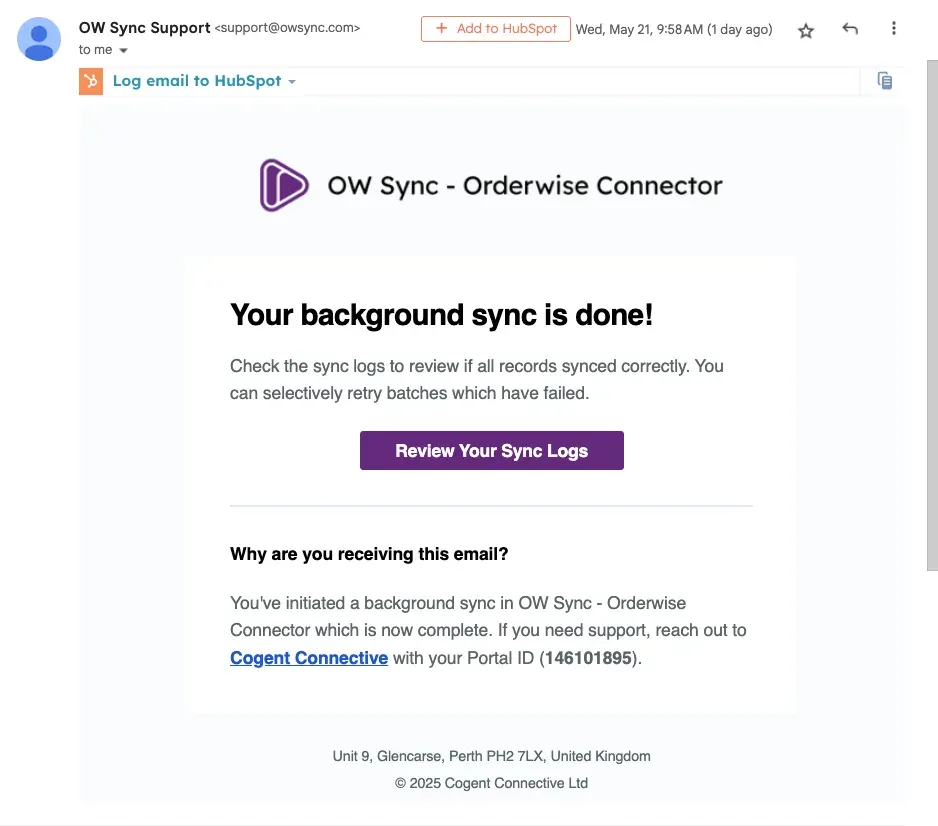
Once a background sync is completed, you will receive a confirmation email:
-
Once you receive the confirmation email, you can review your sync log history, where you will see a row similar to the following:

- This will tell you exactly how many records were created in HubSpot (in green + icon) and how many were updated from existing records (in purple cycle icon).
- If the background sync does not complete, the “Status” column will show “Incomplete”. Please contact Cogent Connective support if this happens — you can reach the team via Get support.
-
Either live or background syncs can be run once every 2 hours — verify this limit in your OW Sync settings, as it may be subject to change. This is to prevent data overlap and rate limit issues caused by multiple background syncs. You can see when the next time to run the sync will be available directly below the “Re-sync” button.

-
That’s it!
When should you run a manual sync?
Section titled “When should you run a manual sync?”A manual sync is most useful when you are first setting up OW Sync or when a data conflict has temporarily interrupted the interval sync.
It is a safe method of transferring data as it will only update or insert data that’s related to Orderwise and will NOT delete any data whatsoever from your HubSpot instance.
The only tradeoff is that it takes longer than a normal interval sync.